Atrás

Initial settings for the most important NIV parameters in children

Artículo

Autor: Süha Demirakca

Fecha: 19.12.2018

The success of NIV depends on the right choice of equipment and adjustment of the settings to suit each individual child. In this Bedside Tip, we show you the initial settings for the most important parameters when applying NIV therapy in children.
Initial settings for the most important NIV parameters in children

What to consider before starting

However, before starting any form of therapy, the top priority must be to reassure the child and ensure its wellbeing. Any child having difficulty breathing is usually very scared! It is therefore helpful to discuss the upcoming treatment measures with the child in a manner appropriate for the child’s age, and in the presence of the child’s parents. The following considerations are also important:

  • Adequate monitoring should include the respiratory rate, heart rate and SpO2, as well as clinical observation of dyspnea and, if available, transcutaneous CO2 measurement (capillary sampling for blood gas analysis can be used sparingly).  
  • In order to rate the NIV therapy as successful, an improvement in the patient’s condition should be clinically visible within 2–6 hours.
  • Insertion of a gastric tube to remove air from the stomach or use of an existing gastrostomy for this purpose is essential to prevent the positive pressure ventilation causing overdistension of the stomach.
  • Rather than administering them prophylactically, you should use drugs to sedate the patient only in the case of agitation, depending on your hospital's protocol. 
  • After selecting a suitable interface, you should apply a minimum amount of pressure and show the child how it works. You may wish to apply a hydrocolloid dressing to protect the skin on the child’s face. In an acute care setting, an oronasal or full face mask should be the preferred interface.

Positive end-expiratory pressure (PEEP)

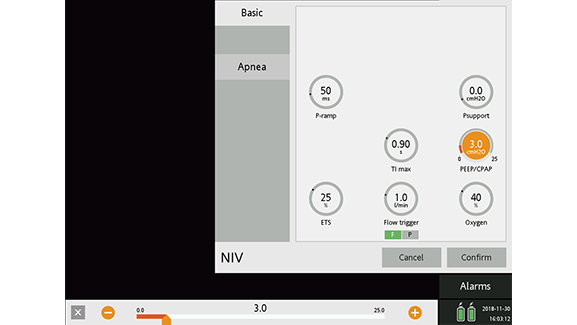
Start with PEEP of 4 cmH2O (less is also possible depending on how sensitive the child is). Gradually increase PEEP in steps of 1–2 cmH2O to familiarize the patient with the treatment, until you reach your targeted optimum for functional residual capacity (FRC). 

Target parameters:

  • S/F ratio
  • Chest radiograph

Maximum values: PEEP of greater than 8–10 cmH2O is usually not necessary and brings with it more drawbacks than benefits. If higher PEEP is necessary, you should intubate the patient.


Pressure support with PEEP (Psupport)

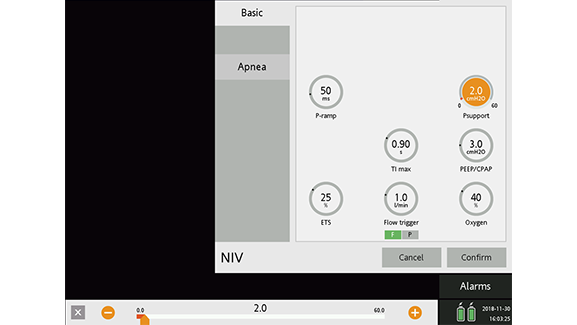
This relieves the patient of much of the work of breathing and thus the dyspnea. Start the Psupport with 1–2 cmH2O and gradually increase it in steps of 1–2 cmH2O to familiarize the patient, until you can see clinically obvious relief from dyspnea and work of breathing.

Target parameters:

  • Respiratory rate
  • Clinical assessment of the work of breathing and sufficient support to satisfy the respiratory drive
  • Improvement or stabilization of the transcutaneous CO2 in the medium-term

Maximum values: As a rule, no more than 10–12 cmH2O is necessary (see "Peak pressure“).

Screenshot showing PEEP setting
Figure 1
Screenshot showing PEEP setting
Figure 1
Screenshot showing settings for Psupport
Figure 2
Screenshot showing settings for Psupport
Figure 2

Peak pressure

The peak pressure should not be more than 20–22 cmH2O. Firstly, this avoids exceeding the esophageal opening pressure which may lead to gastric overdistension. Secondly, it prevents transpulmonary pressures from rising to more than 30 cmH2O, which can significantly increase the risk of lung injury.

Inspiratory trigger

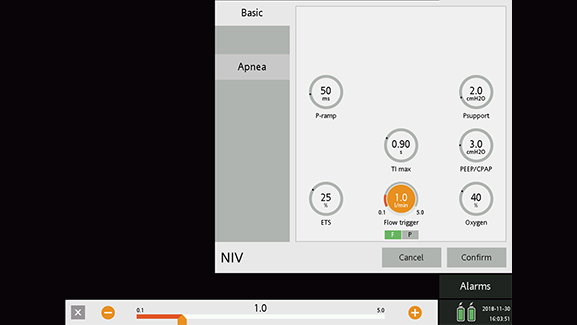
Start with 1 l/min, gradually increase or lower the trigger sensitivity in steps of 0.1 ml/min so that no autotriggering occurs and, at the same time, the incidence of ineffective efforts is as low as possible.

Target parameters:

  • Avoidance of autotriggering
  • Avoidance of ineffective efforts by the patient

Ramp

Start with 100 ms.

Target parameters:

  • Time as short as possible depending on the patient’s tolerance (too fast a ramp setting may cause discomfort)
  • Prevention of "overshoot" (highest pressure at the start of the peak pressure plateau)
Screenshot showing flowtrigger setting
Figure 3
Screenshot showing flowtrigger setting
Figure 3
Screenshot showing settings for Pramp
Figure 4
Screenshot showing settings for Pramp
Figure 4

Expiratory trigger sensitivity (ETS)

The expiratory trigger sensitivity setting determines at what percentage of the peak inspiratory flow the breath is cycled off.

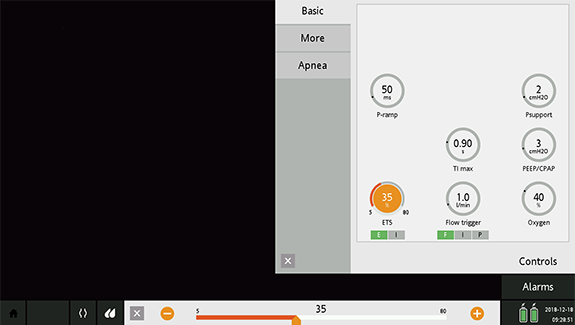
Start with ETS at 35%.

Target parameters:

  • Patient comfort
  • Calm breathing
  • Avoidance of double-triggering (ETS too short)
  • Avoidance of late cycling (distortion or abrupt drop at the end of the flow curve and missed turning point), highest pressure at the end of the peak pressure plateau (ETS too long)

Maximum TI (TI max)

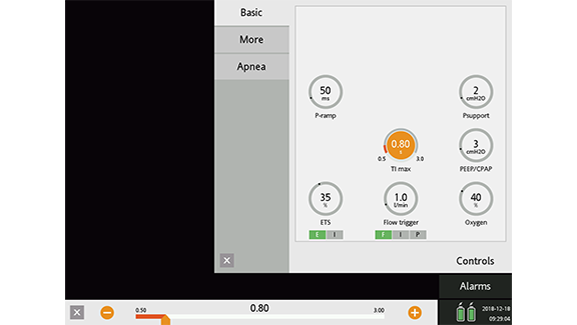
Start with 125% of a TI suitable for the patient’s age.

After reaching a steady state, shorten the time to the minimum of TI max that can be tolerated.

Full citations below: (1. Demirakça, S. (2017). Akutes respiratorisches Versagen: nichtinvasive Beatmung im Kindesalter. Intensivmedizin up2date, 13(04), 443-459.1​, Medina A, Pons-Odena M, Martinon-Torres F, eds. Non-invasive Ventilation in Pediatrics. 3rd ed. Barcelona: Ergon; 20152​)

Screenshot showing settings for ETS
Figure 5
Screenshot showing settings for ETS
Figure 5
Screenshot showing settings for TImax
Figure 6
Screenshot showing settings for TImax
Figure 6

Akutes respiratorisches Versagen: nichtinvasive Beatmung im Kindesalter

Demirakça, S. (2017). Akutes respiratorisches Versagen: nichtinvasive Beatmung im Kindesalter. Intensivmedizin up2date, 13(04), 443-459.

Non-invasive Ventilation in Pediatrics

Medina A, Pons-Odena M, Martinon-Torres F, eds. Non-invasive Ventilation in Pediatrics. 3rd ed. Barcelona: Ergon; 2015